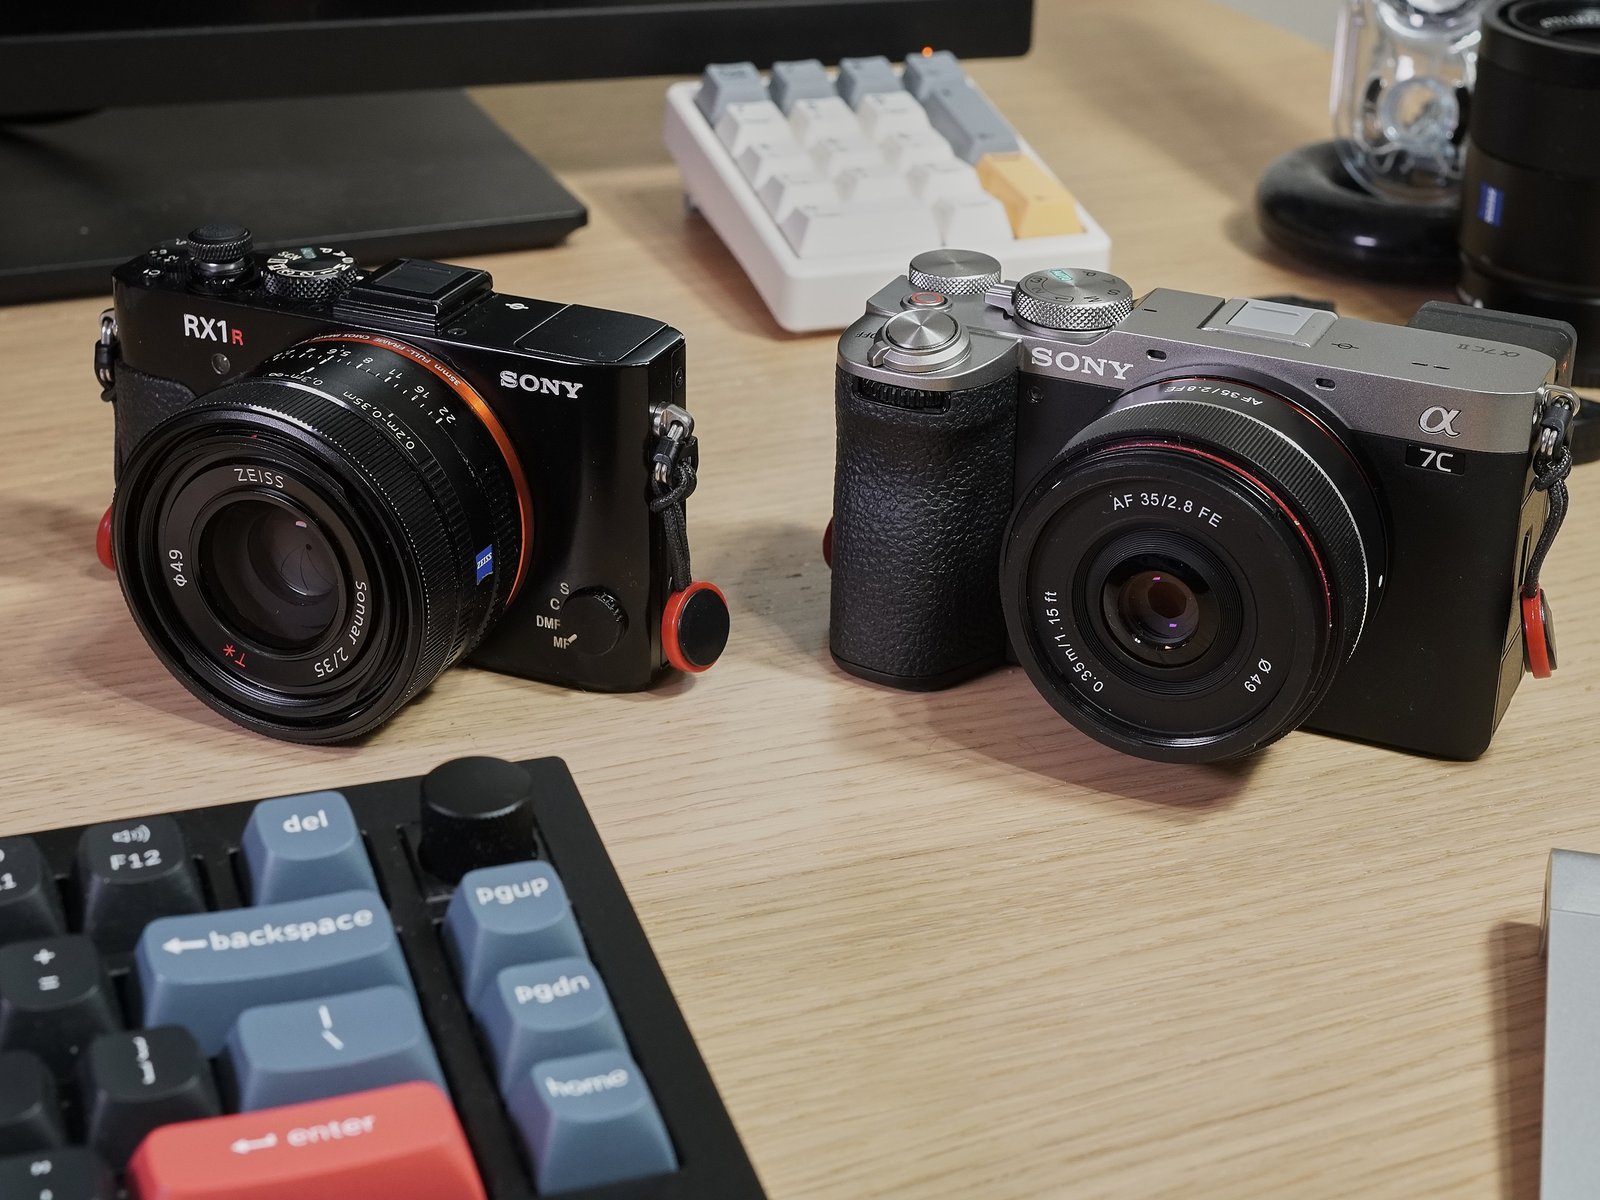
I got the new Sony A7C II this weekend! It is likely to replace most/all of my interchangeable lens cameras. I just love the rangefinder shape, and people seem less guarded around cameras without a serious-looking pentaprism bump on top.
As of this writing, there isn’t much third party support for A7C II raw .ARW images yet. But the A7C II uses the same image sensor as the older, widely-supported A7 IV – so the raw files should be very similar.
I’ve figured out how to make them pretend to be from an A7 IV using ExifTool – it works for my workflows in Capture One and Apple-based raw editors on macOS. And be warned: it’s not entirely stable.
These instructions are for the Mac, and require basic command line skills. The process should be similar with Windows syntax.
DISCLAIMER: I am a stranger on the internet, and we’re talking about doing naughty things to a proprietary file format with third party software. I’m probably doing some of these things wrong. I am not responsible for the accuracy of these instructions, or damage/data loss on your equipment. You should make your own backups and take other precautions, especially if your stuff is important.
Contents
- SHORT VERSION (for command line jockeys)
- FULL INSTRUCTIONS
- Step 1: Get ExifTool.
- Step 2: Copy your .ARW raw images to a folder on your Mac.
- Step 3: Open that folder in your terminal.
- Step 4: Make your .ARW file(s) pretend an A7 IV made them
- Step 5: Enjoy your photos! (with caution)
- Technical details and thoughts
- Versions / Compatibility
SHORT VERSION (for command line jockeys)
- Install ExifTool (
brew install exiftoolon macOS) - Import your files to a directory.
- In that directory, run:
exiftool -SonyModelID=ILCE-7M4 -Model=ILCE-7M4 -Software='ILCE-7M4 v2.00' *.ARW
(or justfilename.arwif you don’t want a wildcard)
FULL INSTRUCTIONS
Step 1: Get ExifTool.
It runs on Unix (including macOS) and Windows. Official instructions are here, but because it’s available in Homebrew for Mac, I installed it with:
brew install exiftoolStep 2: Copy your .ARW raw images to a folder on your Mac.
You’ll need to do this through the filesystem/Finder, not your photo app’s import function. It’s OK to include other file formats if you have them.
In my example, I put them in Desktop > first-day-a7cm2 .
Step 3: Open that folder in your terminal.
I did this withcd ~/Desktop/first-day-a7cm2
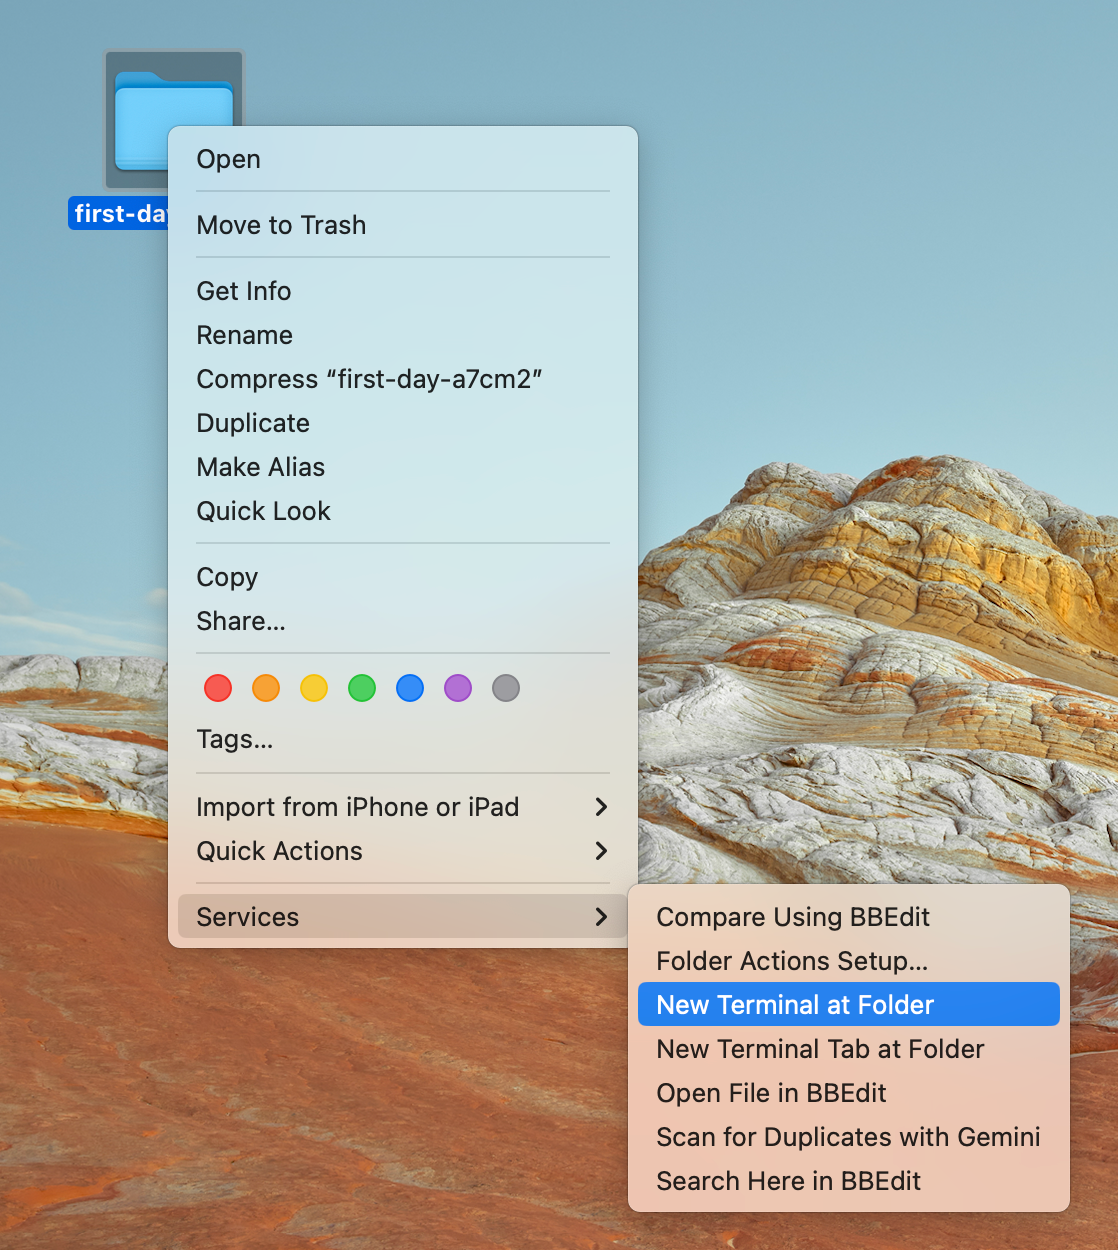
Or through the UI by Ctrl+clicking the folder and selecting Services > New Terminal at Folder.

Step 4: Make your .ARW file(s) pretend an A7 IV made them
We’re using ExifTool to make three changes to the ARW file metadata.
If you want to disguise all the .ARW files in the folder, run this in the terminal:
exiftool -SonyModelID=ILCE-7M4 -Model=ILCE-7M4 -Software='ILCE-7M4 v2.00' *.ARWIf you only want to disguise one file, remove the * (wildcard) and use a specific filename instead:
exiftool -SonyModelID=ILCE-7M4 -Model=ILCE-7M4 -Software='ILCE-7M4 v2.00' *.ARWStep 5: Enjoy your photos! (with caution)

Capture One + Digistock Imperfect Kodachrome K64B
Your folder should now show usable thumbnails on the .ARW files. I was able to import these files to Capture One, or edit them in apps that depend on Apple’s Raw support (like Photos.app and sometimes Photomator). I haven’t tested Lightroom. Be careful with apps/services that sync raw files to the cloud – they might not be fully compatible. Same goes for mobile OSes.
Please report back in the comments about what works/doesn’t (and with which versions).
Technical details and thoughts
I needed to create/change both of these values to make both Capture One and Apple RAW open the file:
SonyModelID                     : ILCE-7M4
Model                           : ILCE-7M4
I also set this value in the ExifTool command:
Software : ILCE-7M4 v2.00A few things I don’t know enough about:
I couldn’t decide if I should change the “Software” value above. It had no effect on whether Apple or Capture One could read the data. But I didn’t want a mismatch in 7M4 and 7CM2 values, and suspect that value might be important for other software.
ExifTool doesn’t show any SonyModelID in my original A7C II files, so that’s an addition here to match what I see in A7 IV files. I don’t know if that’s a Sony change, or an ExifTool thing.
Also, even after modifying those metadata values with ExifTool, it still displays the original 7CM2 values when I read them again:
zeke@eep first-day-a7cm2 % exiftool 7C200040.ARW | grep ILCE
SonyModelID                     : ILCE-7M4
Model                           : ILCE-7CM2
Software                        : ILCE-7CM2 v1.00
(my filenames start with “7C2” because I changed the default setting from “DSC” in my camera.)
I know ExifTool treats some values as “read-only”, but I couldn’t get the files to read in both C1 and Apple apps without -Model=ILCE-7M4 even if it still reads back as 7CM2.
There might also be other parts of the RAW file that aren’t exposed by ExifTool, so I’m treating the Raw output as something that could break with future software/firmware versions. I’m keeping backups of the original files just in case.
Versions / Compatibility
I did this using photos taken on camera firmware 1.00 in Lossless Compressed RAW. I used ExifTool 12.60 on macOS Ventura 13.5.2 . I tested the files on Capture One 23 build 16.2.5.9, Photomator 3.0.5, macOS Photos 8.0 (560.0.110), and Preview.
I also do a lot of raw editing on an iPad Pro with Capture One, Photomator, and Photos.app, so I’m still working to figure out which parts of that are/aren’t working with this approach.
Thanks, seems to work on Windows, though you need to add the ExifTools .exe to the path manually. I’ll keep a copy of the files just to be sure I can restore them if I need to when CaptureOne adds native support.